来自AI助手的总结
作者因原版OneinStack被售卖而自行维护了一个版本,并提供了详细的安装、配置及管理教程。
🔊
中文 英文 韩语
由于原版oneinstack已经被卖,但是我又习惯oneinstack了,所以自己维护了一个自己用的版本,就先备份下原来的教程。
yum -y install wget screen #for CentOS/Redhat
# apt-get -y install wget screen #for Debian/Ubuntu
wget http://oneinstack-full.tar.gz #包含源码,国内外均可下载
tar xzf oneinstack-full.tar.gz
cd oneinstack #如果需要修改目录(安装、数据存储、Nginx日志),请修改options.conf文件
screen -S oneinstack #如果网路出现中断,可以执行命令`screen -R oneinstack`重新连接安装窗口
./install.sh

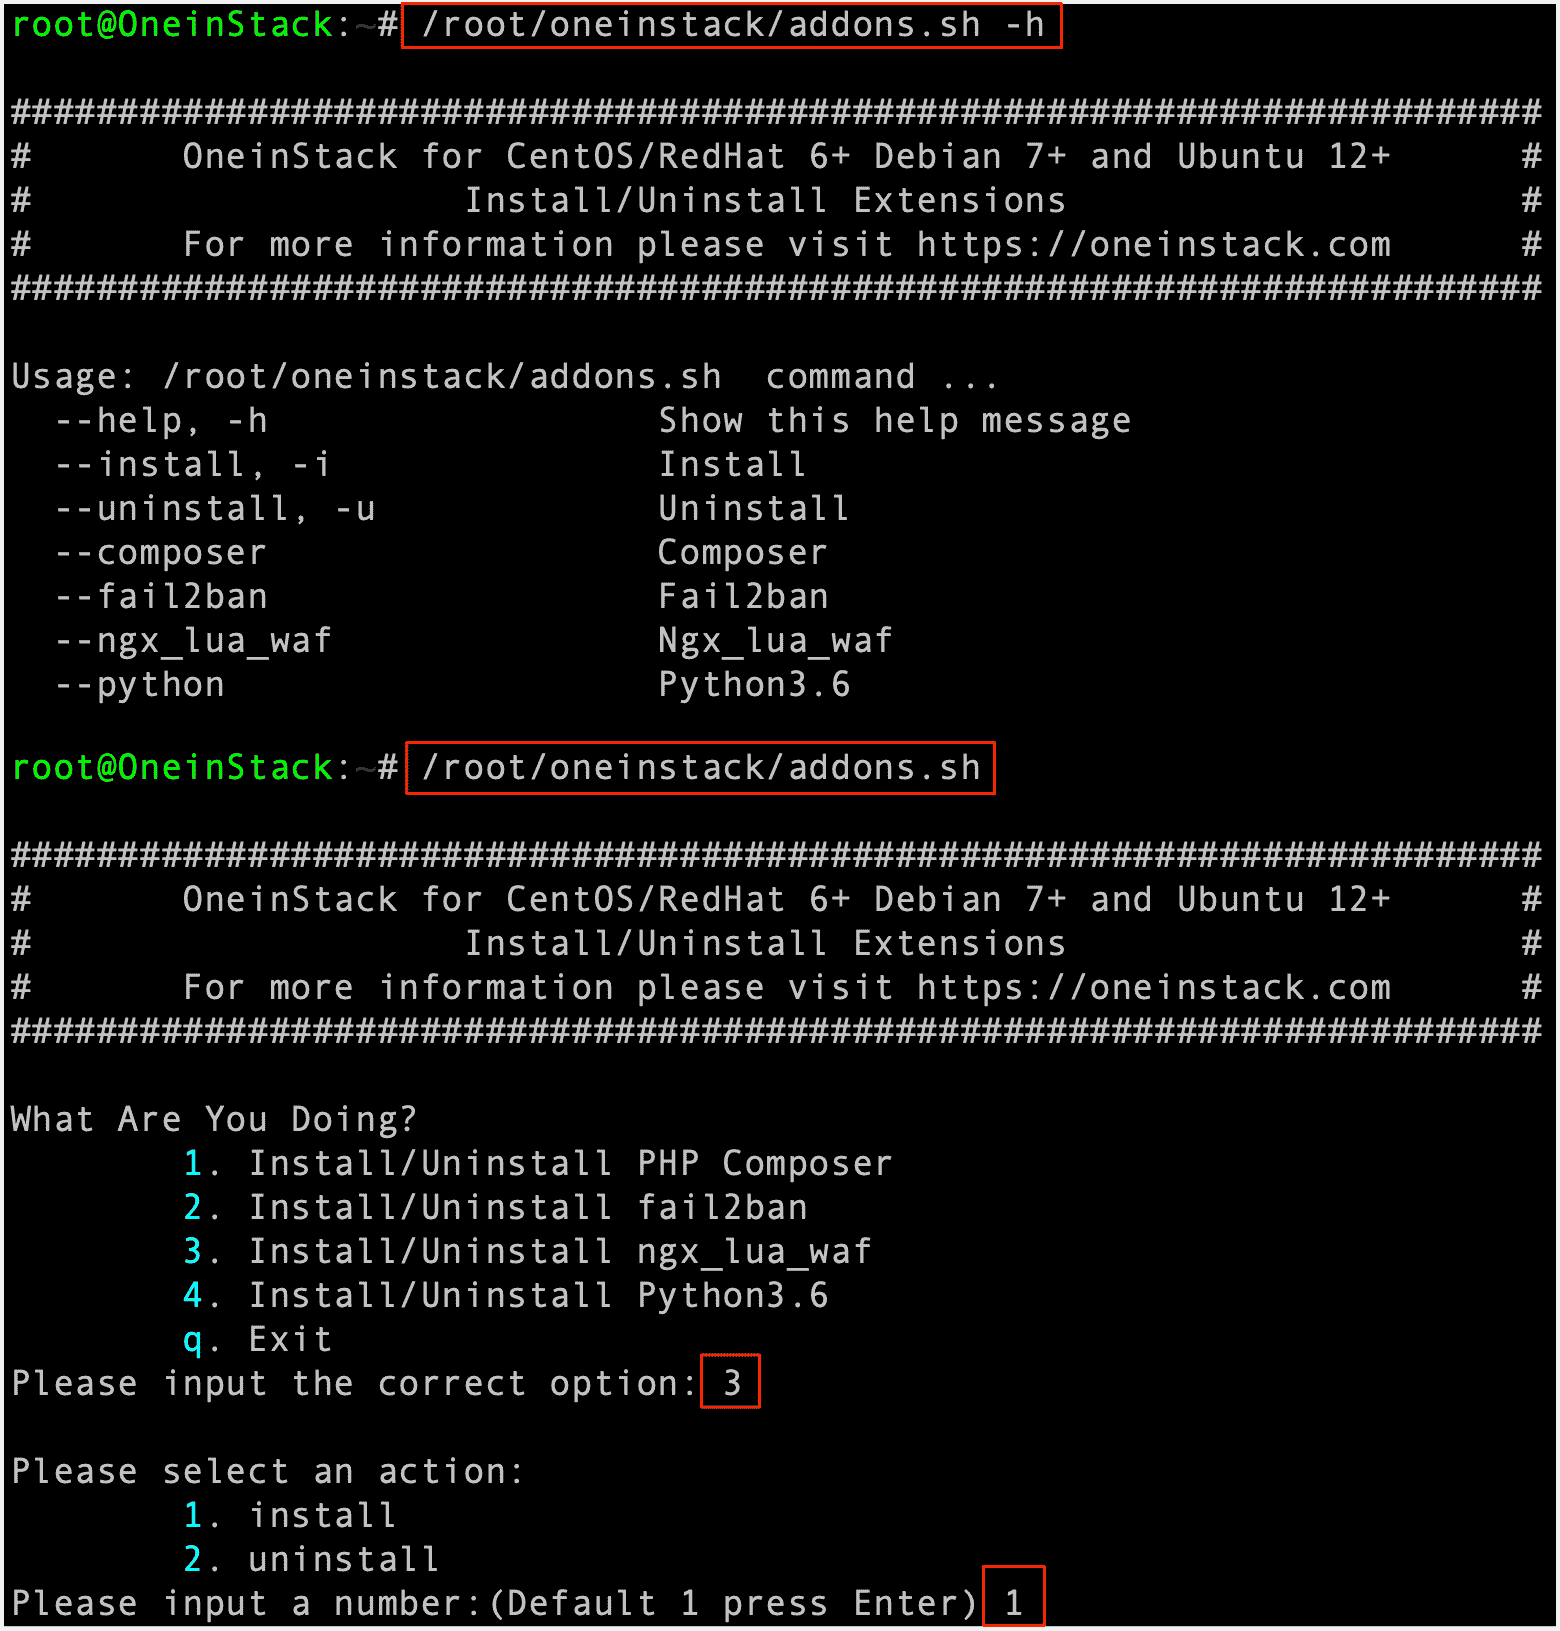
如何添加附加组件?
注意
如果之前没有安装组件,后续补充安装,统一入口为./install.sh,addons.sh脚本不在提供,如之前没有安装php redis扩展,补充安装命令:./install.sh --php_extensions redis
~/oneinstack/addons.sh
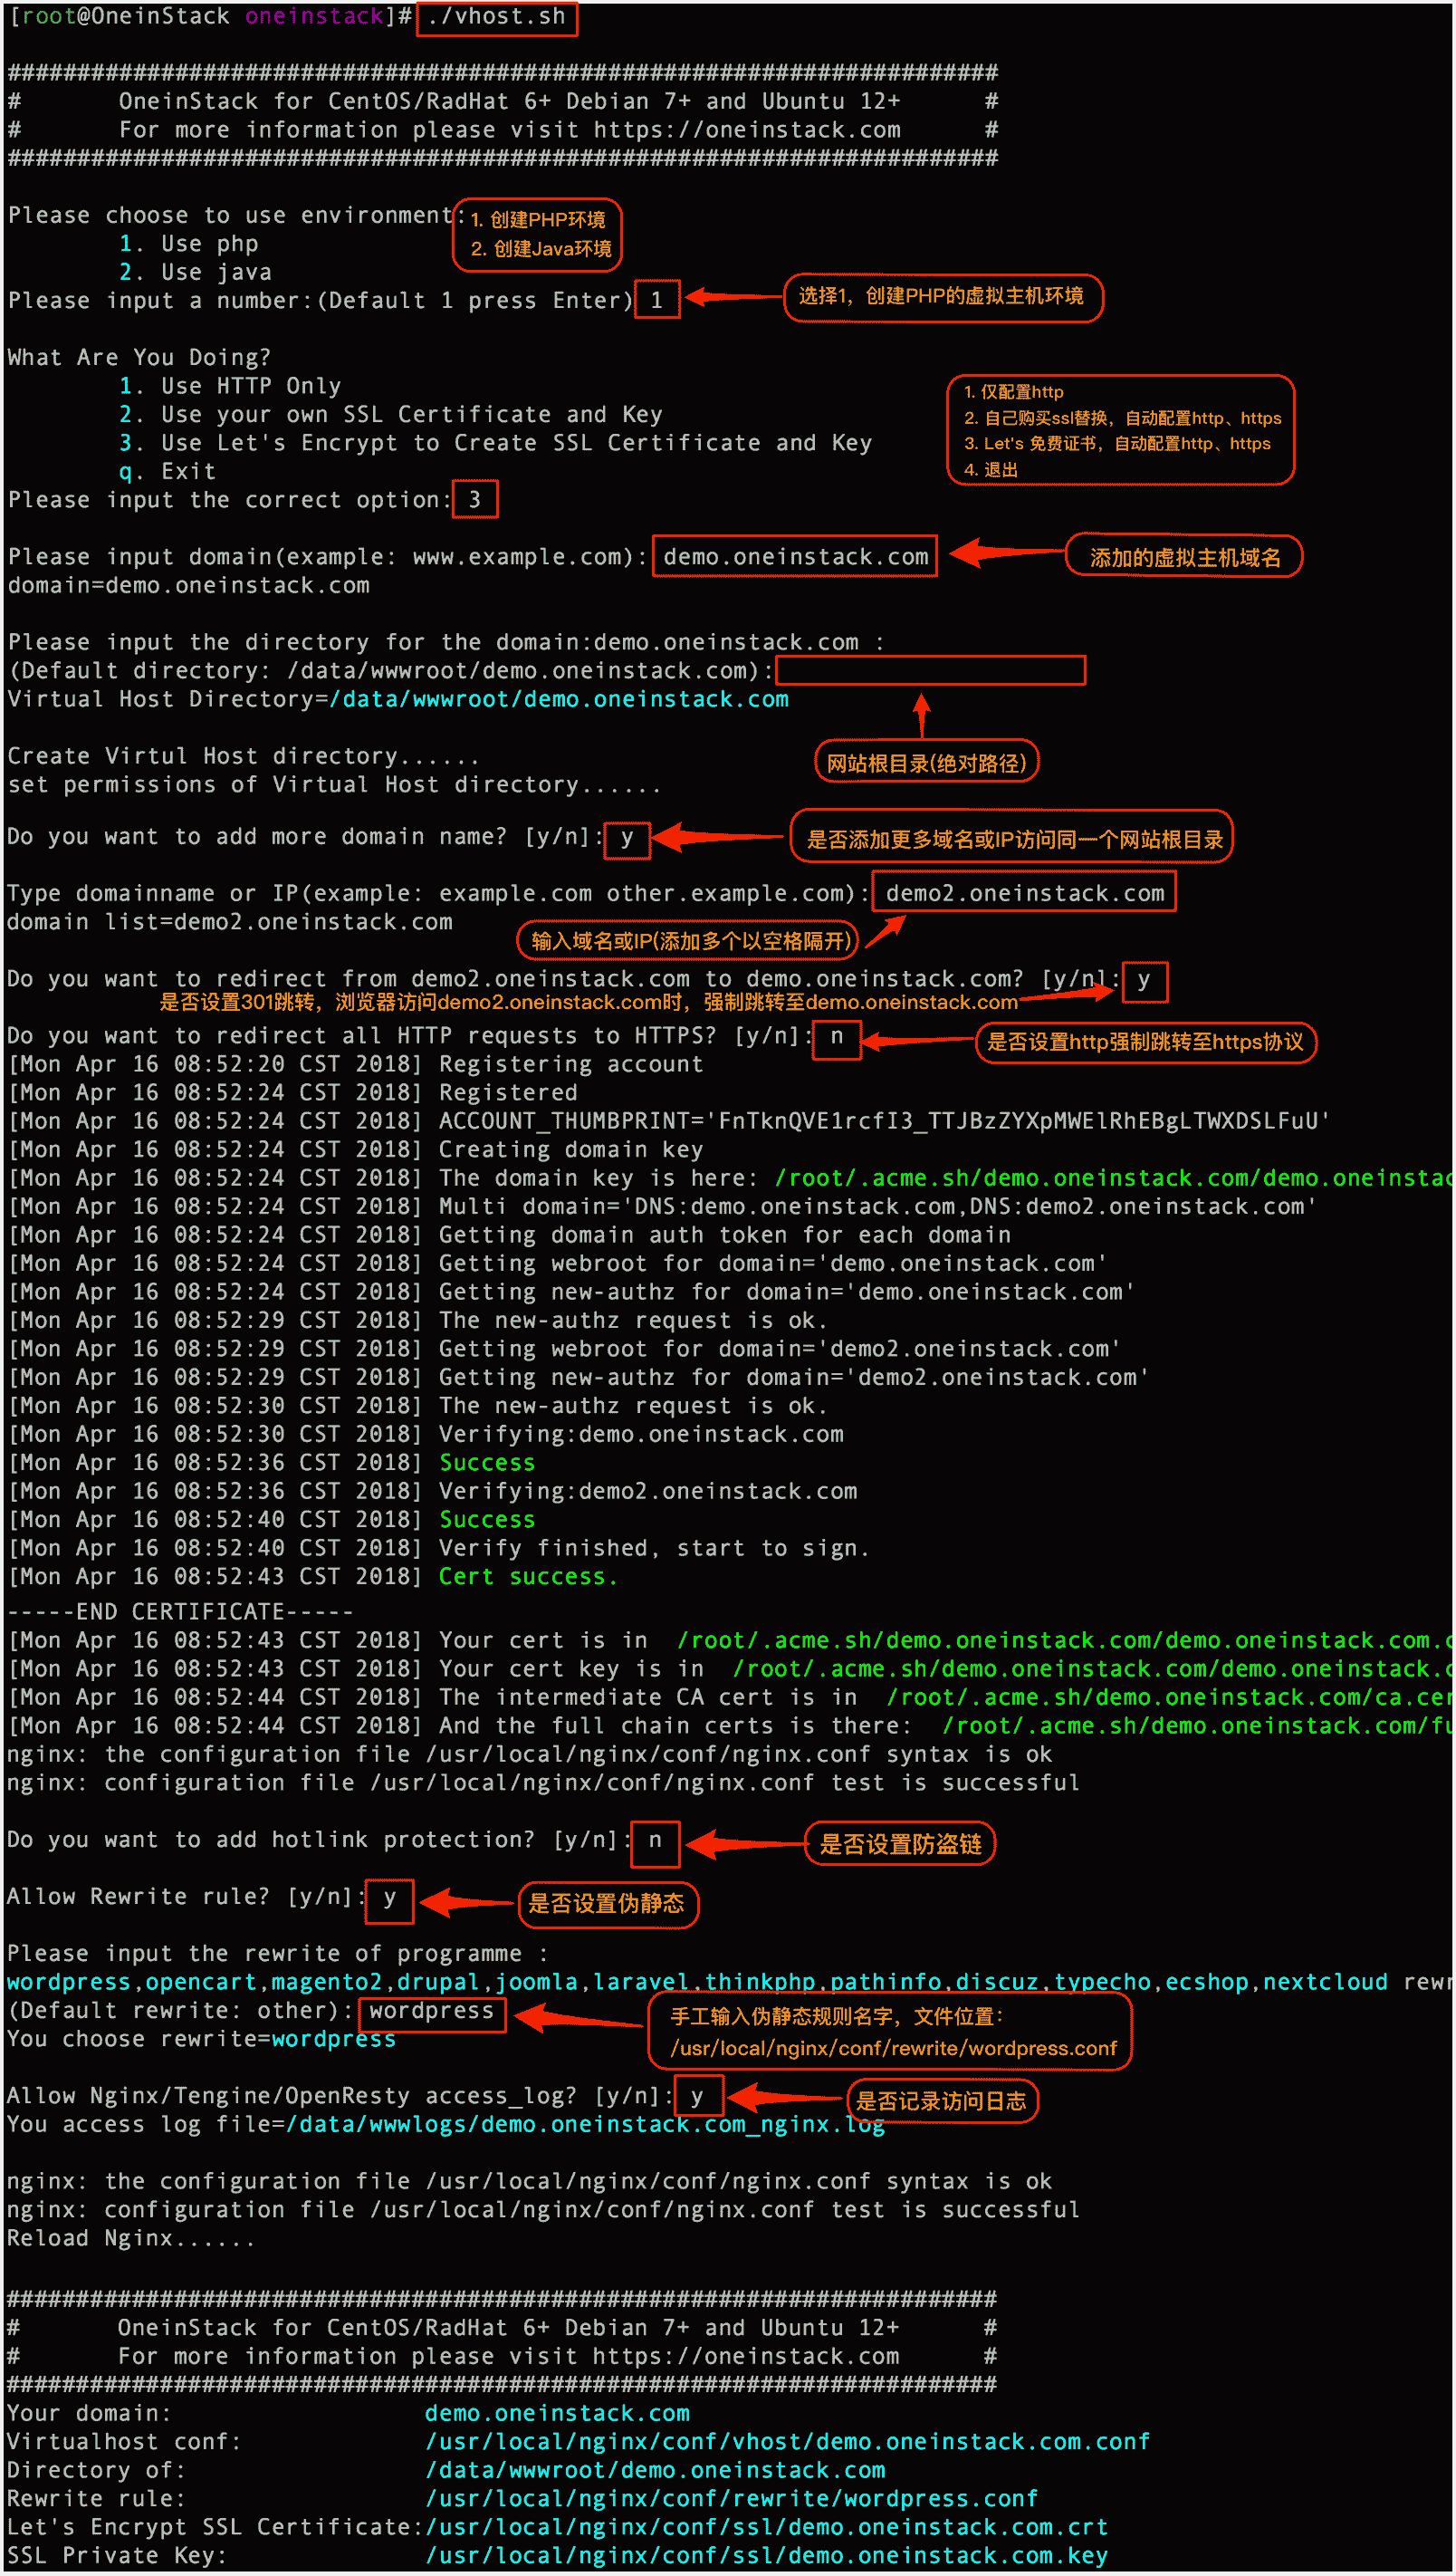
如何添加虚拟主机?
~/oneinstack/vhost.sh
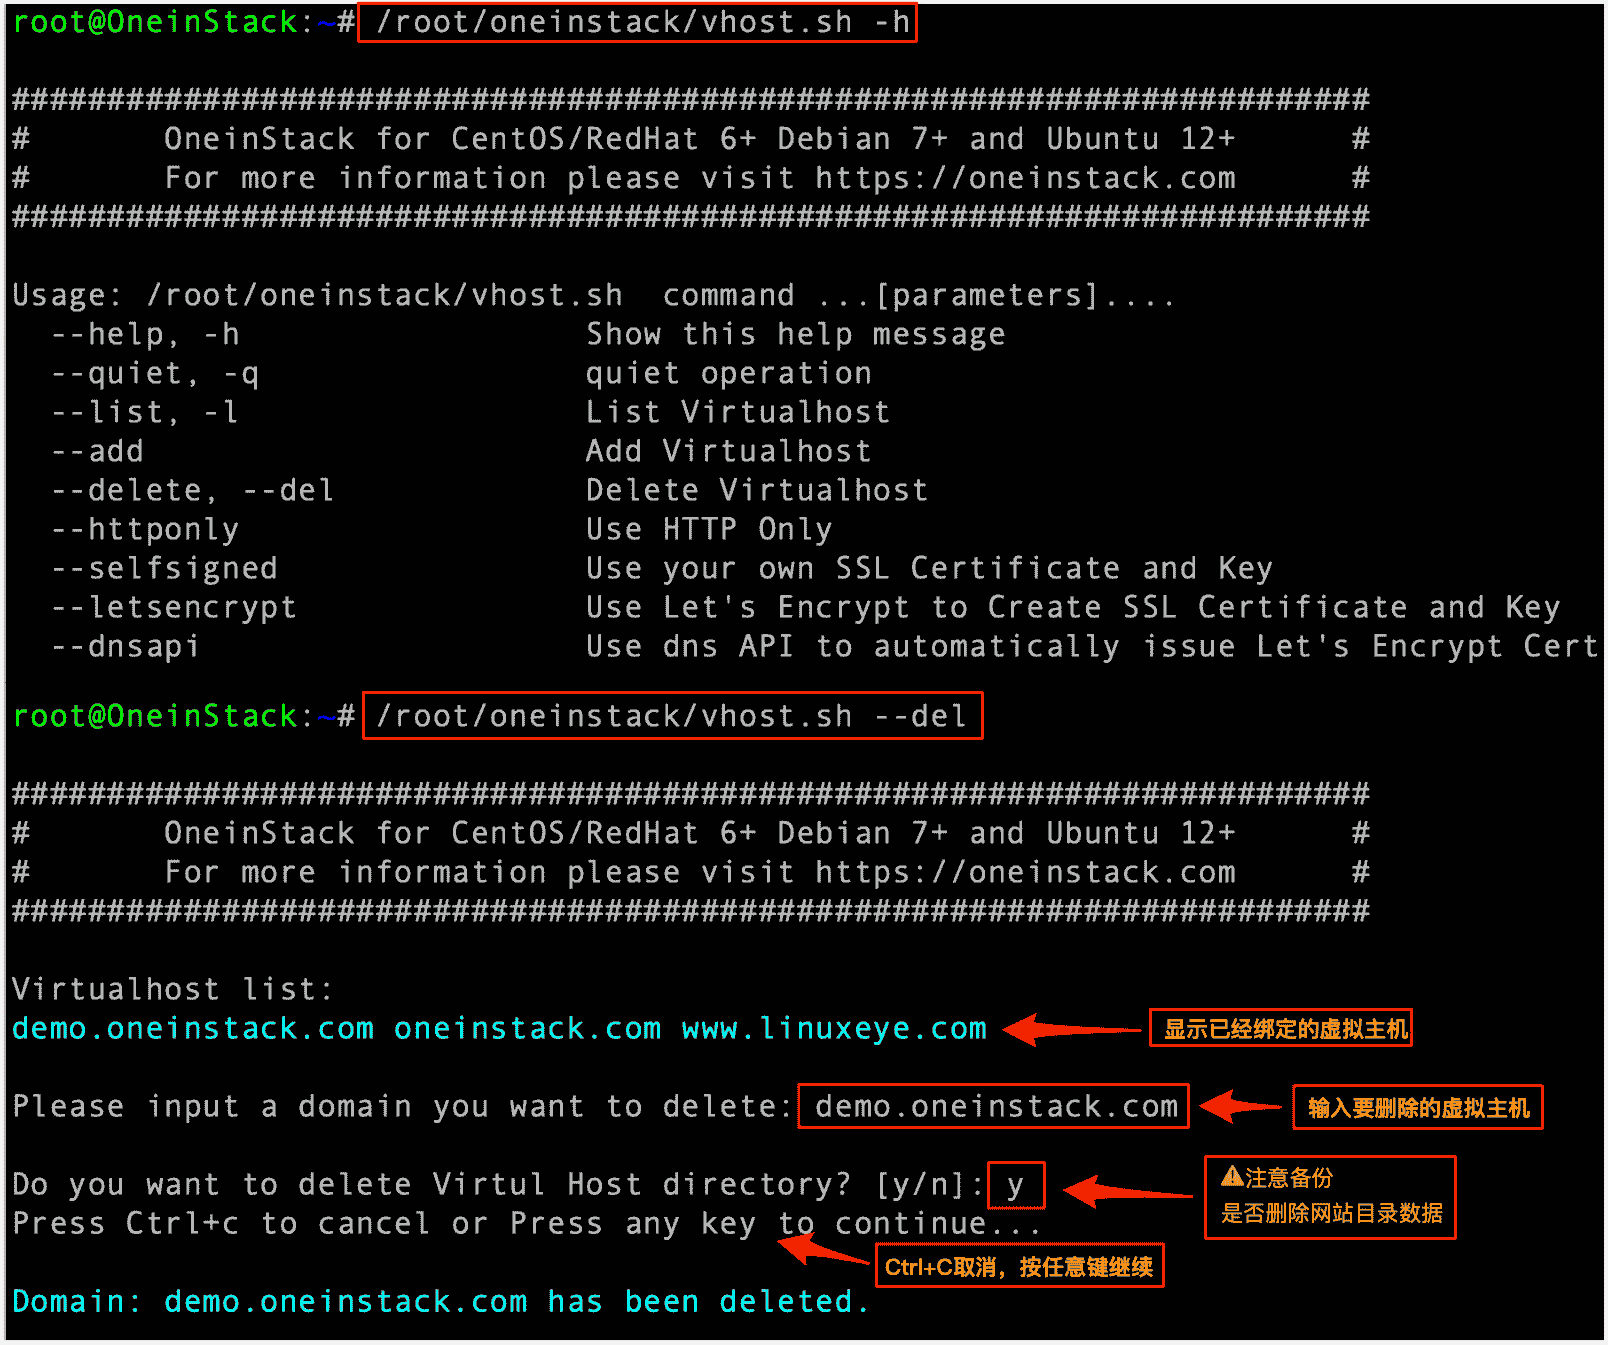
如何删除虚拟主机?
~/oneinstack/upgrade.sh --oneinstack #升级脚本工具,不影响正在运行环境
~/oneinstack/vhost.sh --del
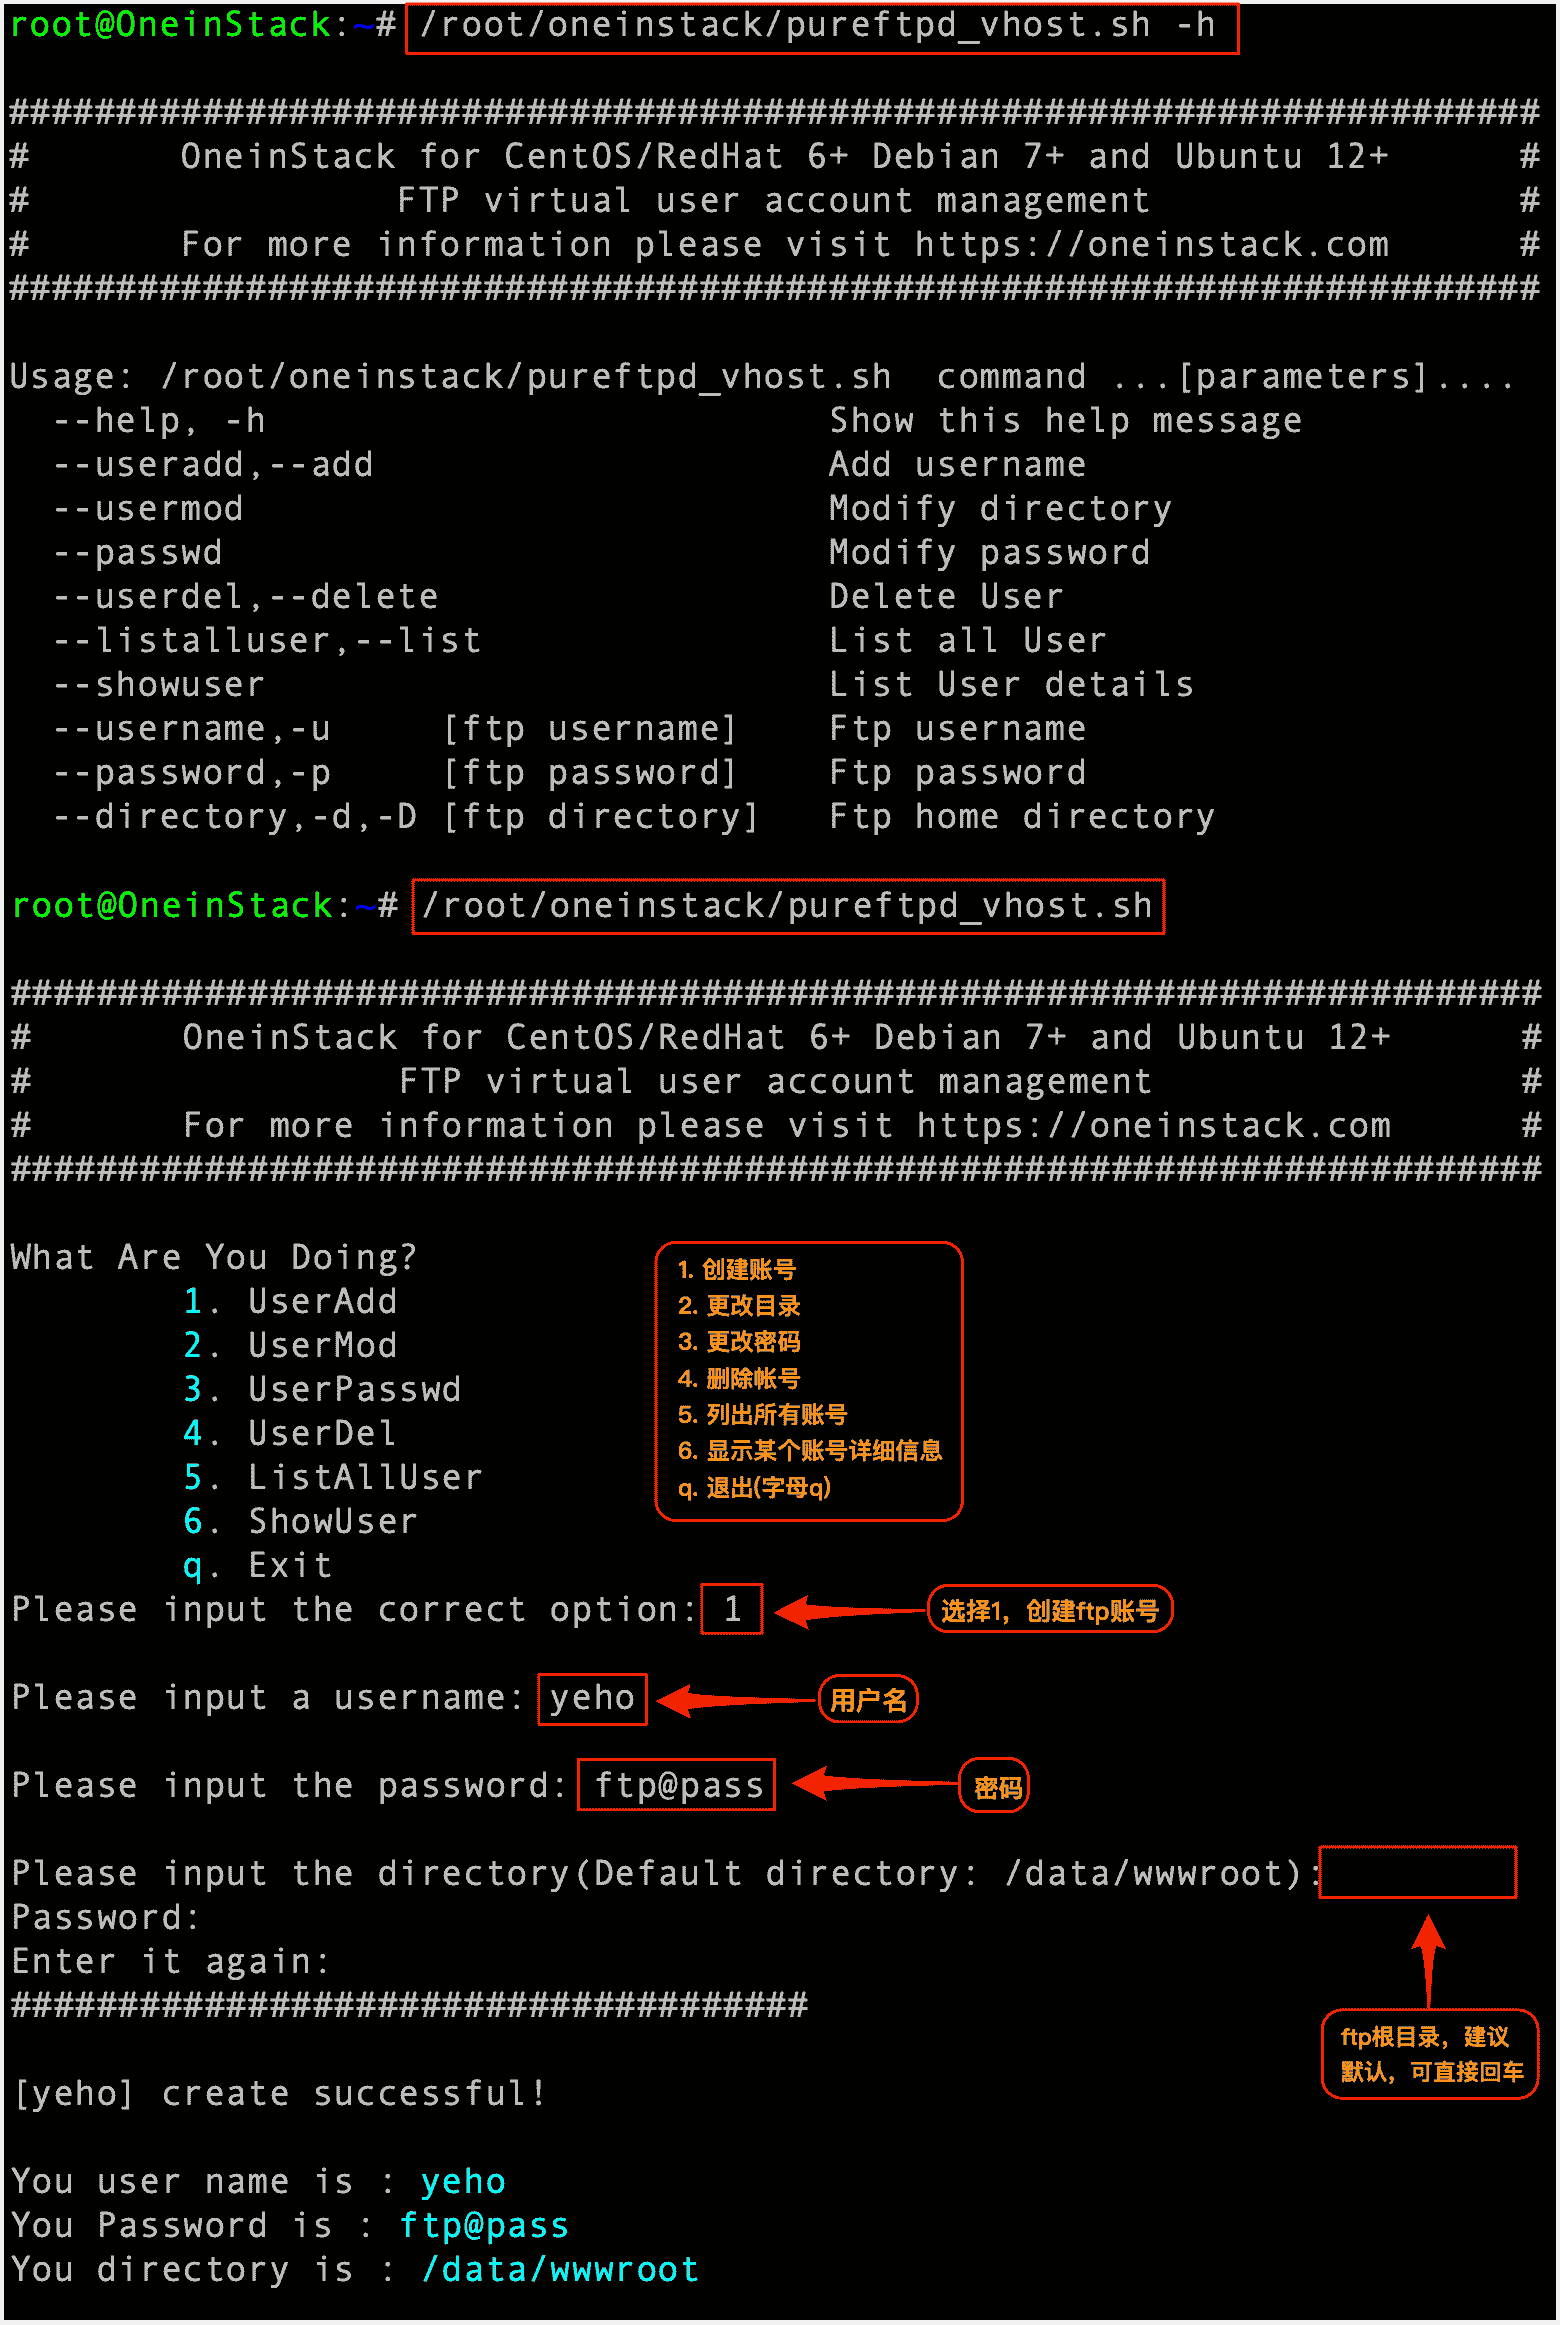
如何管理FTP账号?
~/oneinstack/pureftpd_vhost.sh
如何备份?
~/oneinstack/backup_setup.sh # Set backup options
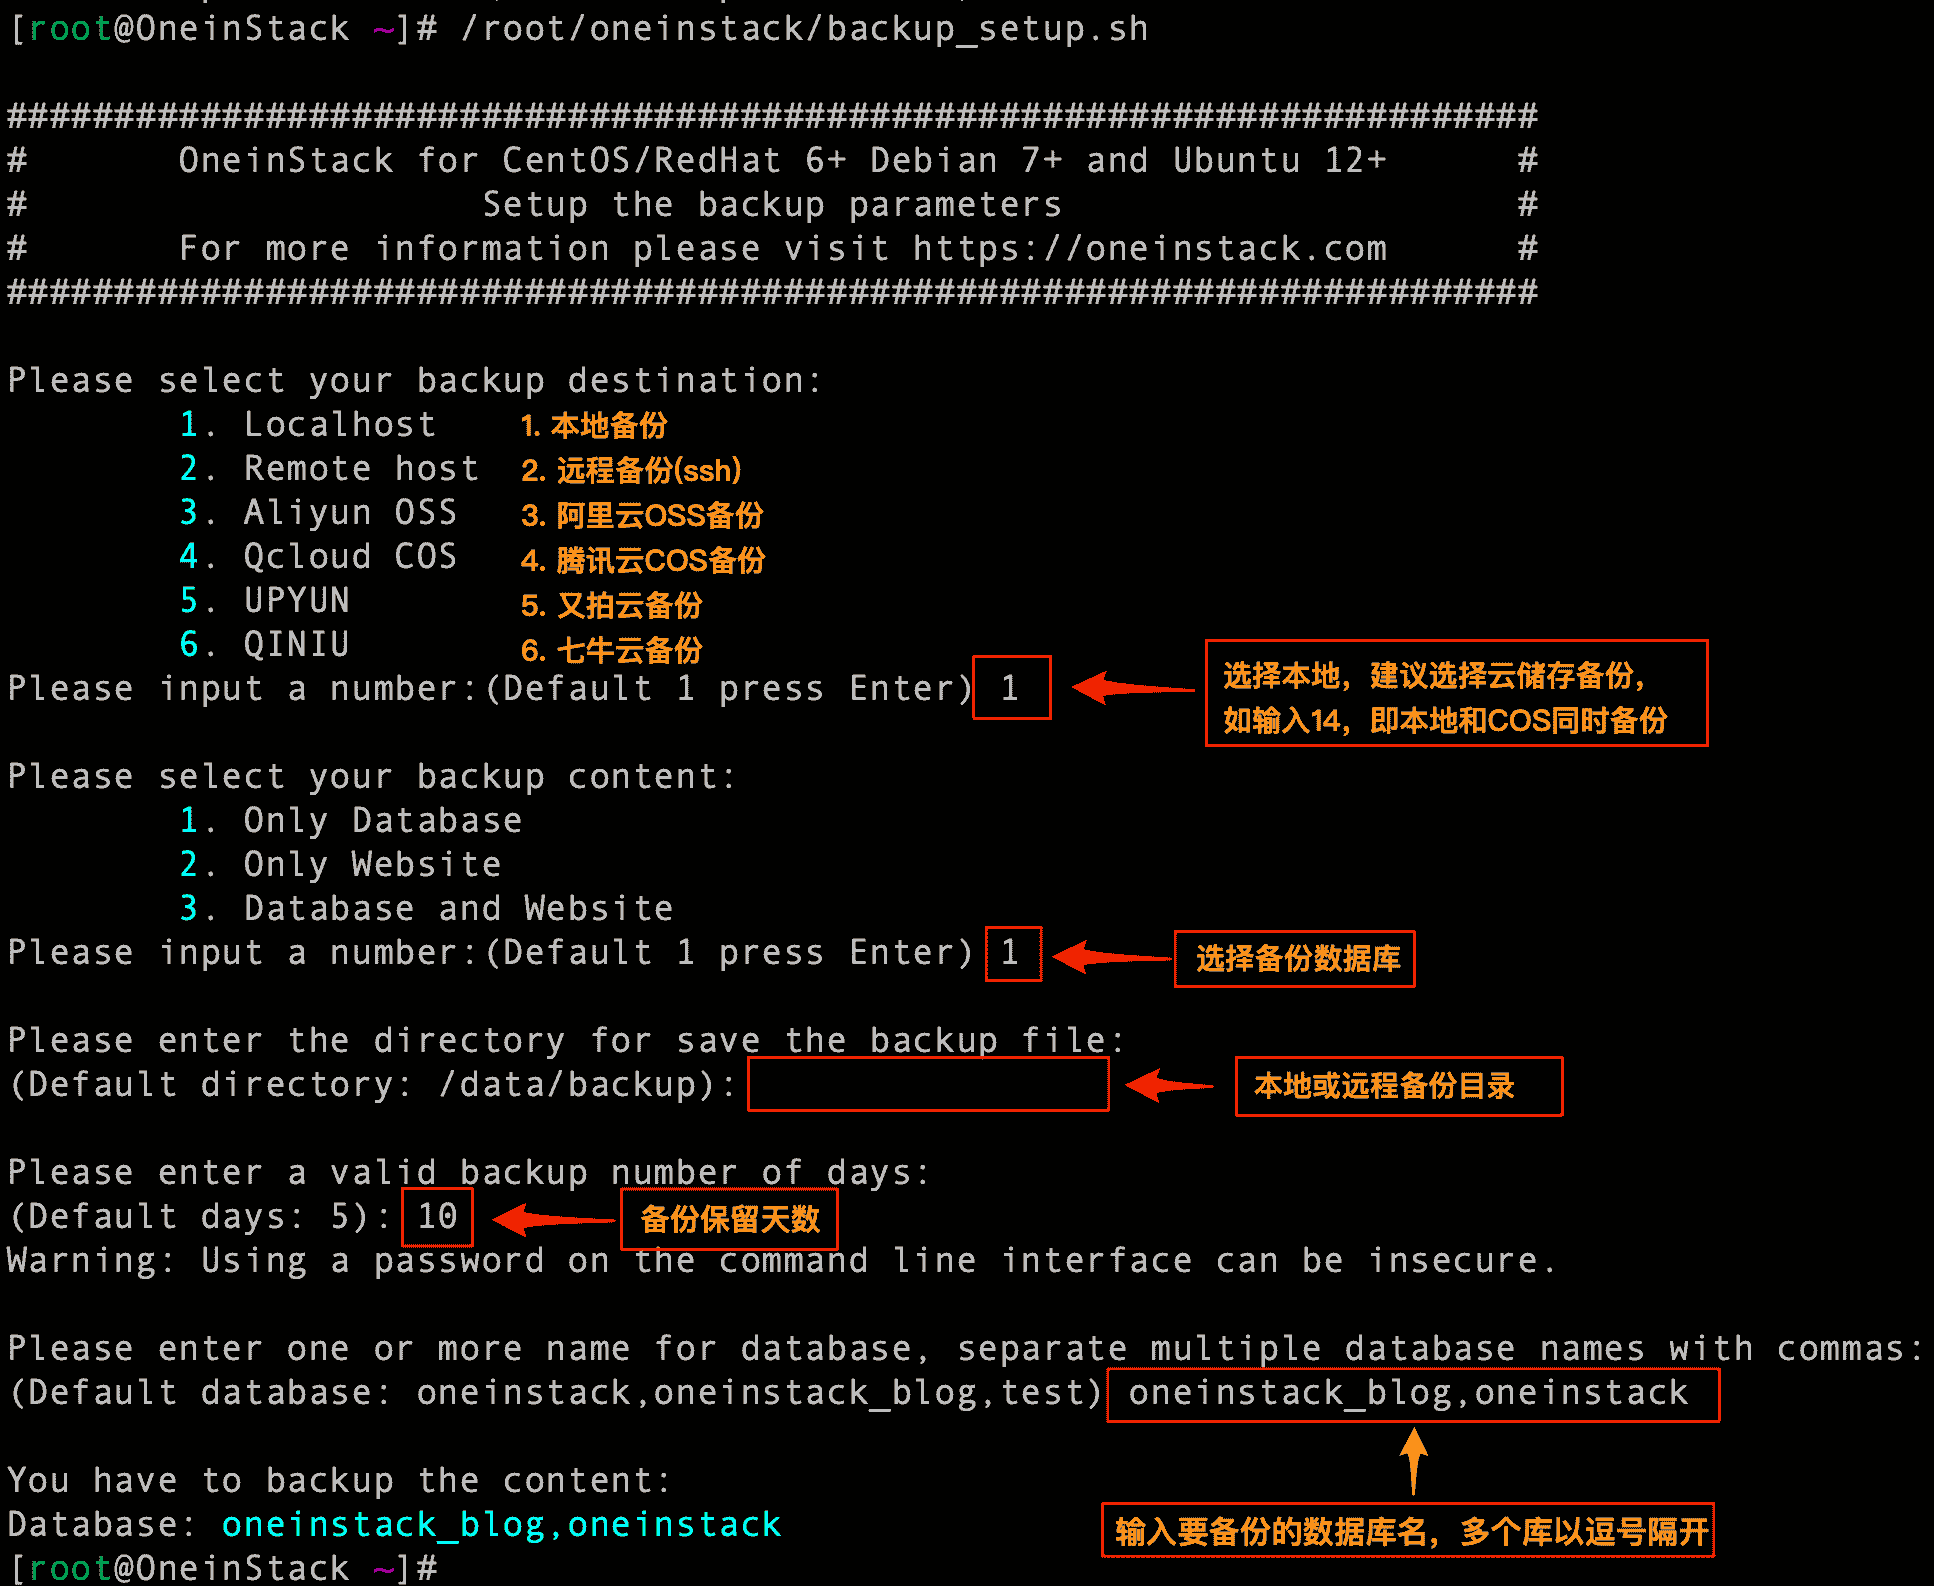
 ~/oneinstack/backup.sh # Start backup, You can add cron jobs
   # crontab -l # Examples
     0 1 * * * ~/oneinstack/backup.sh  > /dev/null 2>&1 &
如何管理服务?
注意
如果服务器包含systemd,则使用systemctl管理,且兼容service。
Nginx/Tengine/OpenResty:
service nginx {start|stop|status|restart|reload|configtest}MySQL/MariaDB/Percona:
service mysqld {start|stop|restart|reload|status}PostgreSQL:
service postgresql {start|stop|restart|status}MongoDB:
service mongod {start|stop|status|restart|reload}PHP:
service php-fpm {start|stop|restart|reload|status}HHVM:
service supervisord {start|stop|status|restart|reload}注:hhvm进程交给supervisord管理,了解更多请访问《Supervisor管理hhvm进程》
Apache:
service httpd {start|restart|stop}Tomcat:
service tomcat {start|stop|status|restart}Pure-Ftpd:
service pureftpd {start|stop|restart|status}Redis:
service redis-server {start|stop|status|restart}Memcached:
service memcached {start|stop|status|restart|reload}如何更新版本?
~/oneinstack/upgrade.sh
cd ~/oneinstack
curl http://mirrors.oneinstack.com/upgrade_oneinstack.sh | bash
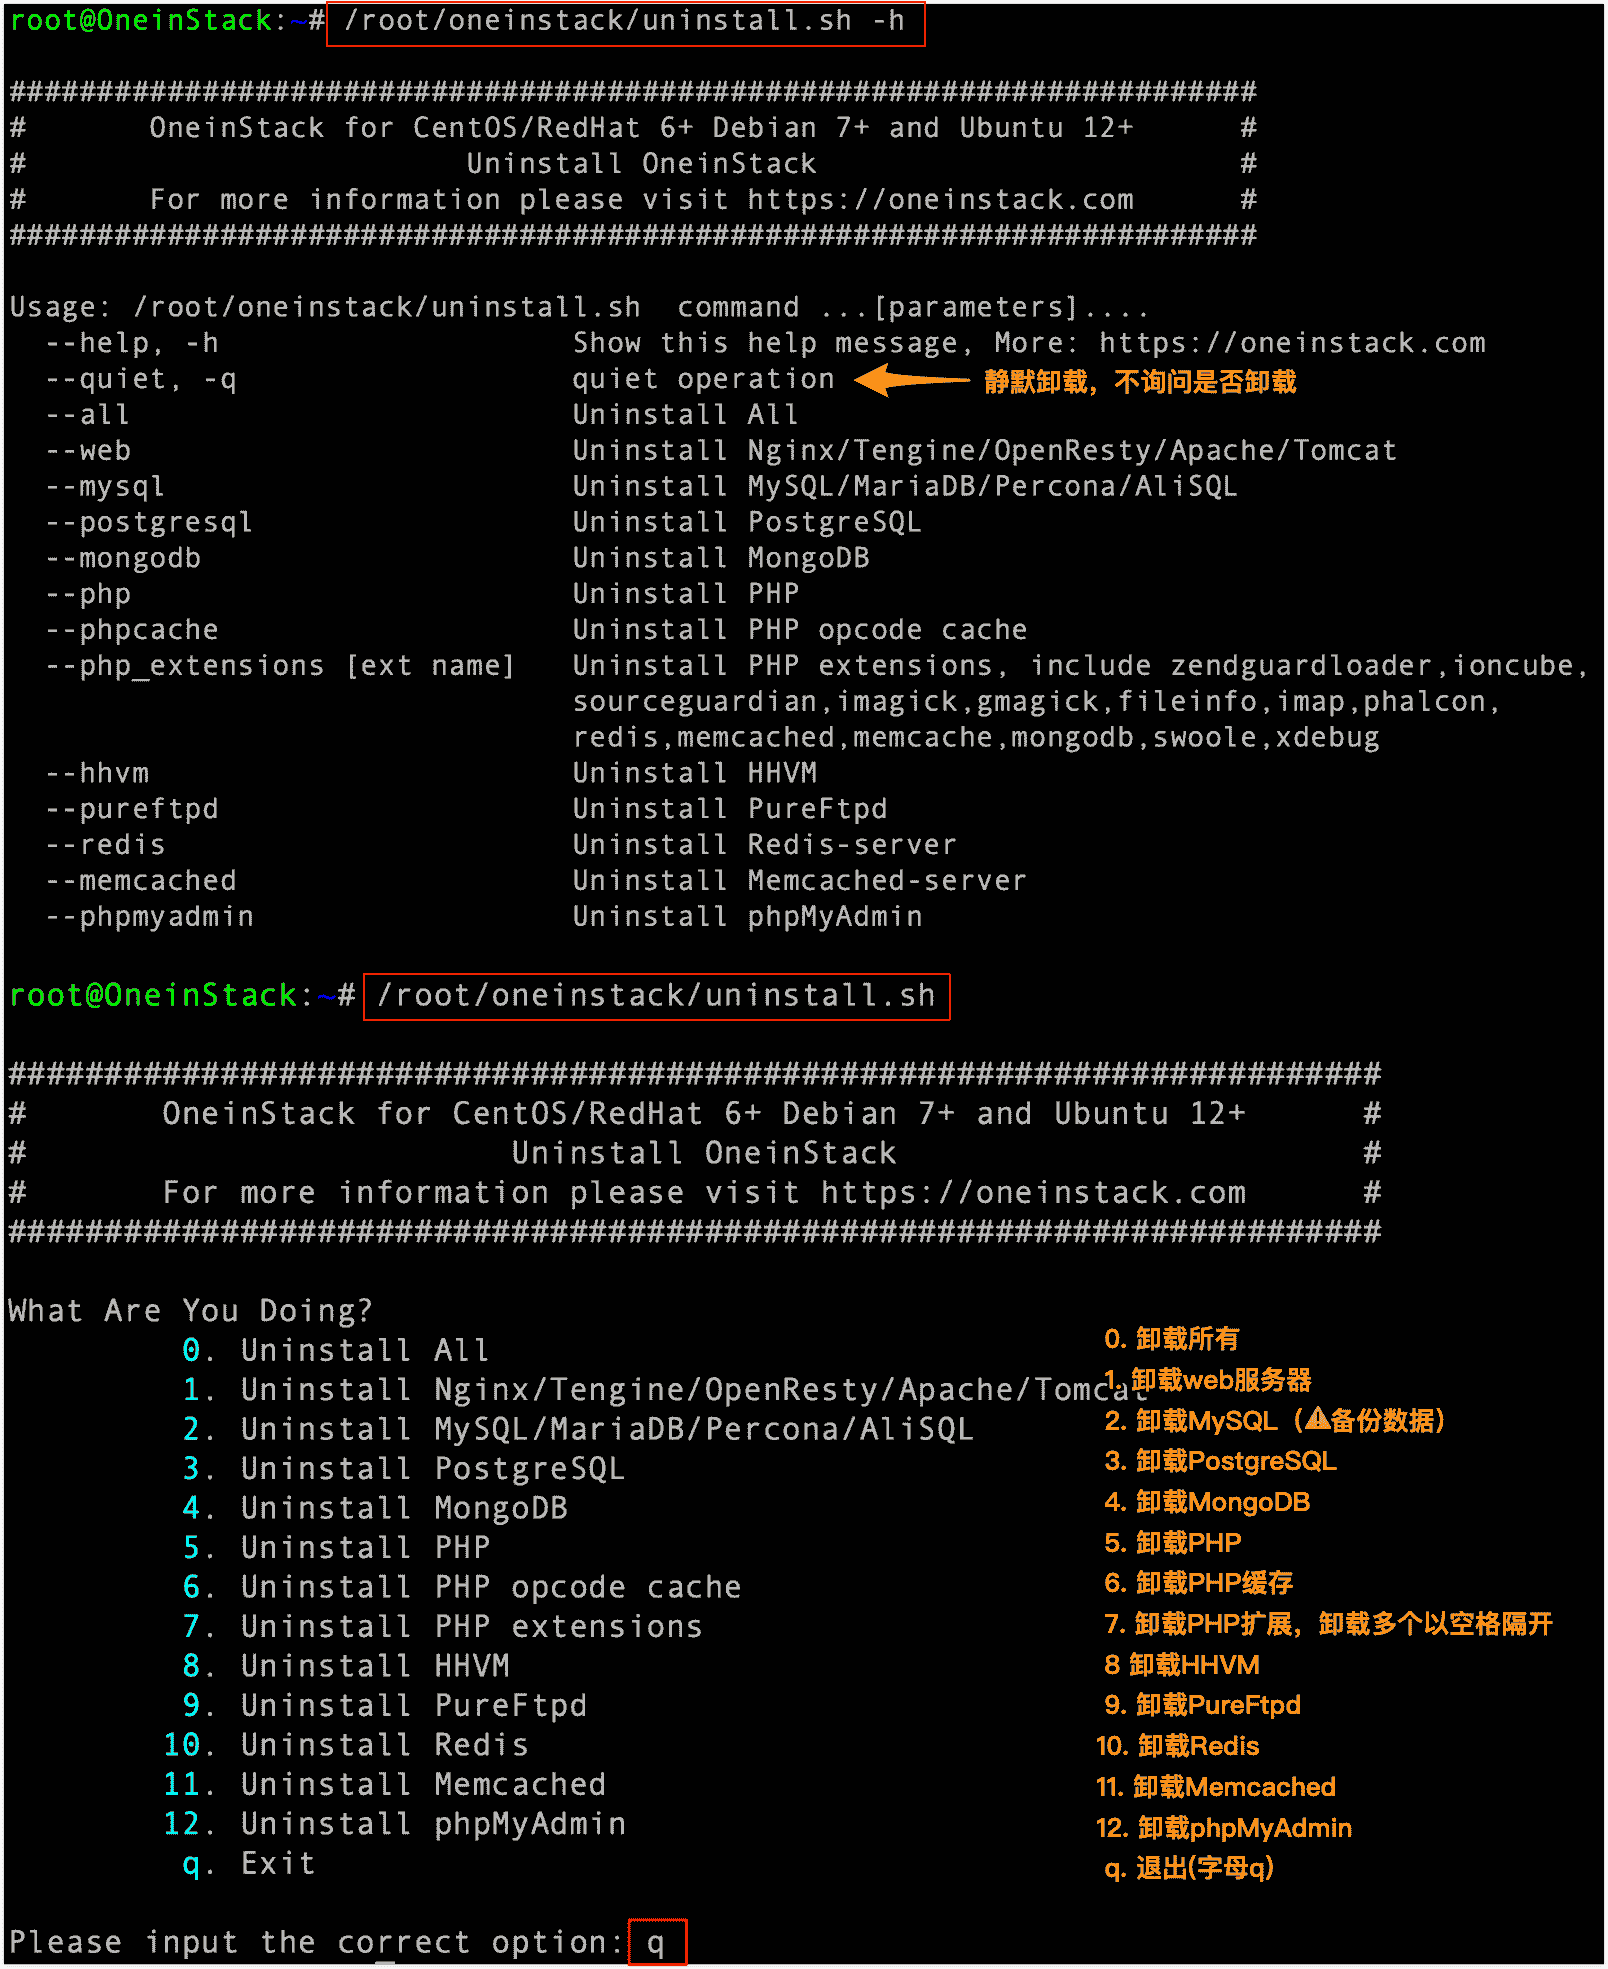
如何卸载?
~/oneinstack/uninstall.sh
安装fileinfo
./install.sh --php_extensions fileinfo
配置MySQL远程连接
为了安全考虑,OneinStack仅允许云主机本机(localhost)连接数据库,如果需要远程连接数据库,需要如下操作(缺一不可):
1. 云主机安全组端口开放3306端口
参考文档:《云主机安全组端口开放教程》
2. 打开iptables 3306端口
PS: 只有开启了iptables才需要此步骤!
如果您的操作系统为CentOS系列:
iptables -I INPUT 4 -p tcp -m state --state NEW -m tcp --dport 3306 -j ACCEPT
service iptables save #保存iptables规则
如下图:
iptables -I INPUT 4 -p tcp -m state --state NEW -m tcp --dport 3306 -j ACCEPT
iptables-save > /etc/iptables.up.rules #保存iptables规则
如下图:

3. 数据库授权
注意⚠️:远程连接新建一个帐号(帐号名不能为root)。
如:添加一个用户名为db_user,密码为db_pass,授权为% (%表示所有IP能连接)对db_name数据库所有权限,命令如下:
1)MySQL8.0版本
# mysql -uroot -p
 MySQL [(none)]> create user db_user@'%' identified by 'db_pass'; #创建用户
 MySQL [(none)]> grant all privileges on db_name.* to db_user@'%' with grant option; #授权
 MySQL [(none)]> exit; #退出数据库控制台,特别注意有分号
2)其余MySQL版本
# mysql -uroot -p
 MySQL [(none)]> grant all privileges on db_name.* to db_user@'%' identified by 'db_pass'; #授权语句,特别注意有分号
 MySQL [(none)]> flush privileges;
 MySQL [(none)]> exit; #退出数据库控制台,特别注意有分号
配置MySQL远程连接
原始数据库密码:
在options.conf的dbrootpwd这里

发表回复